Incubating chickens at home is easy, in 3 weeks you’ll have your own brood of cheeping, fluffy chicks. Do a bit of reading up before you put the eggs in the incubator and you’ll get more healthy chicks with less stress!
Since we’re wanting to establish a small-scale permaculture based egg business, and our hens weren’t going broody – I ordered a 48 egg incubator with automatic egg turners and 240V / 12V power connections.
Our four hens were only producing a 2 or 3 eggs a day which wasn’t going to fill the incubator any time soon, and we had only collected 12 so we asked around the egg sellers at our local farmers market. It was interesting which of the vendors knew whether the eggs they were selling were fertilised or not – one of the vendors turned out to be just buying eggs at a local “factory-free-range” farm and then reselling at the market. That is why they are all uniform size, shape & colour. At least she was honest about it (on being asked)
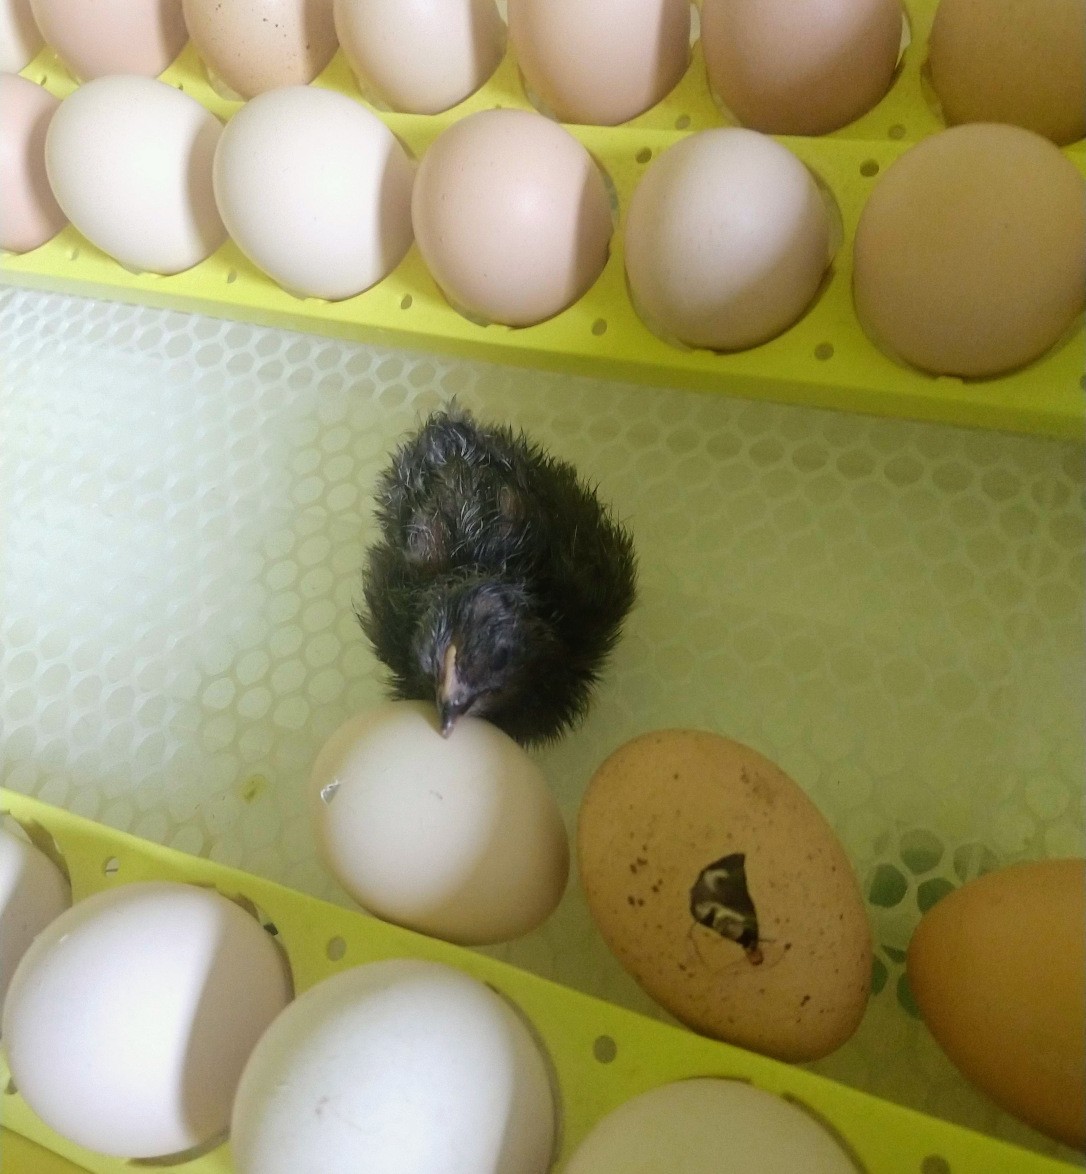 Chicks Hatching
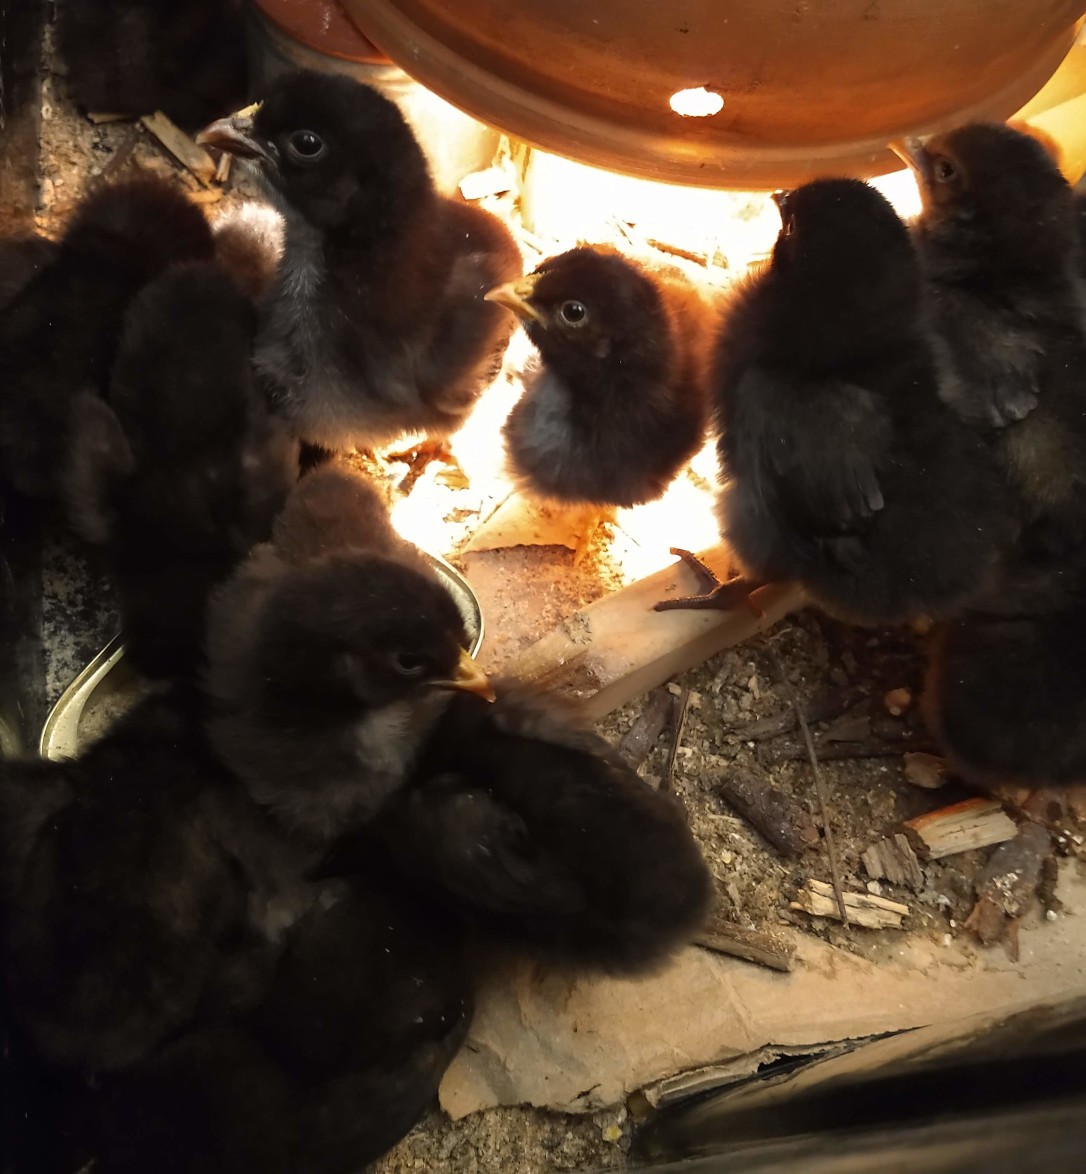 48 hours later
I was only able to find 3 boxes of fertilized eggs so they went into the incubator 3 days after the first batch from our hens.
So…mistake number 1: Putting eggs into an incubator at different times & NOT LABELLING THEM!
Then I had to wait a whole week for the next farmers market, so the following Saturday, in went another 10 eggs – and the incubator kept humming away.
So now there were 3 lots of eggs at 3 different stages of development in the incubator. As the big day arrived for the first hatching, I read the incubator manual “take eggs out of cradle rockers on day 18” uh oh…
So not knowing which eggs needed to be removed I left them all in their rockers & hoped for the best.
Day 20, and a loud cheeping was heard from the incubator first thing in the morning! our first chick had hatched & found it’s way to the space in the middle of the incubator, so maybe hatching in the rockers wasn’t going to be a disaster.
Quite a few more of the eggs were pipped, and then not thinking I removed them from their positions & placed – next mistake…once an chick has pipped the egg it shouldn’t be moved. Also opening the incubator is bad news while chicks are hatching as this messes with humidity, a potentially fatal problem for your chicks!
As a rule, you should wait 48 hours from when you notice the first egg has been pipped before opening the incubator. The first chicks to hatch will be fine in the warm, damp conditions for at least 2 days. So unless you absolutely have to, don’t open the incubator.
After waiting another 48 hours and being sure there were no more chicks to hatch, I candled the remaining eggs (by holding a bright LED light under it) to determine whether they had dead embryos inside or were never fertile in the first place.
In the end – out of 40 eggs there were following results from incubation no. 1:
18 live fluffy chicks
12 no embryo formed (ie. the egg wasn’t fertilised in the first place)
8 embryo formed but never pipped
2 pipped but subsequently died
Not a bad first run given that around day 12 there was an all night power failure – the 12V battery kicked in, but by 6:30am the temperature had dropped to 33 degrees C – quite a lot lower than is needed for sucessful incubation (37.9 – 38 degrees C)
I’ve now thouroughly washed & sun sterilized the incubator & loaded it up for round 2!
Ending thoughts:
While “continuous” incubation is a good concept – in reality this doesn’t work well on a small scale as after the first hatch you have lots of bacteria covered bits left over from the hatching process. Then by the time the next hatch happens it absolutely stinks and I’m sure puts the newly hatched chicks at risk from infection.
Also the newly hatched chicks stumble around the incubator after hatching and can potentially get stuck between the moving parts holding the still-incubating eggs.