What you need
- Milk…if you can, get it straight from a cow! if you don’t have one on hand – ask around at your local farmers market. The happier the cows that make the milk the better the yogurt. We get our milk direct from the farm, where we can see that the cows are living their best lives possible on lush pastures and being cared for by the farmer. We get our milk for R75 (about $4) for 5L straight and unpasteurized from the farmer
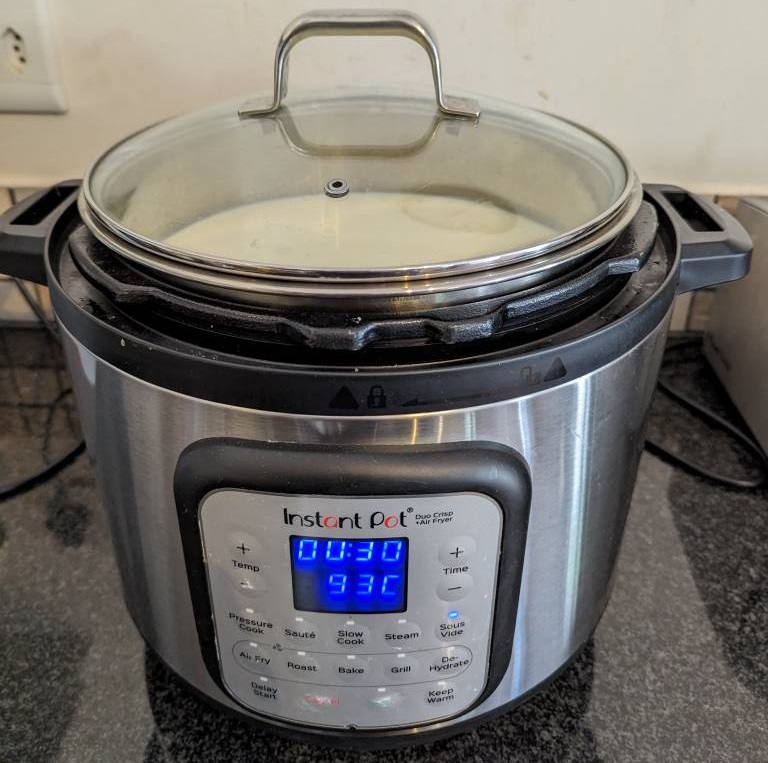
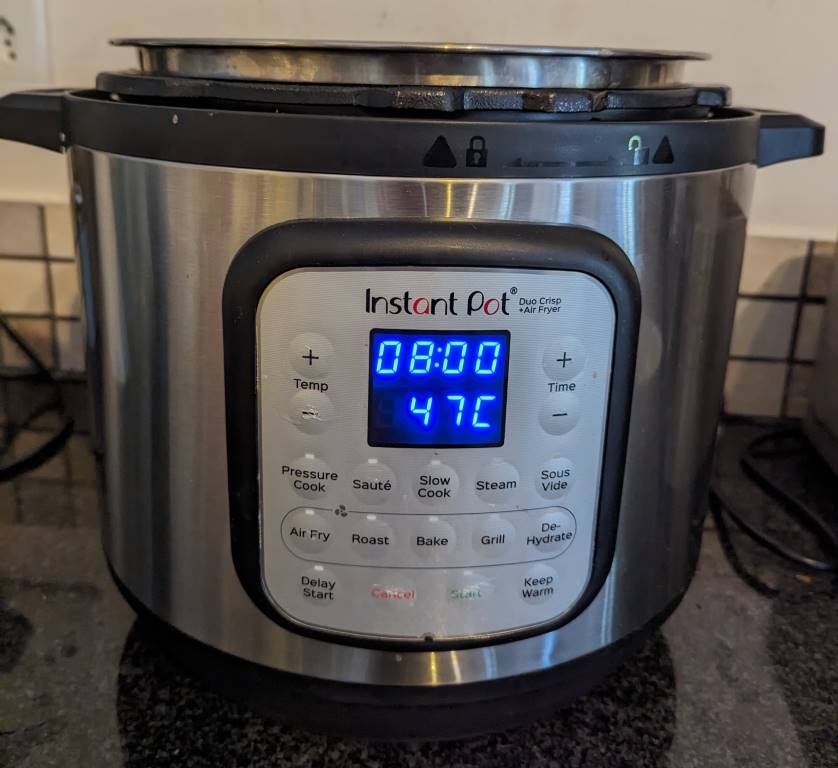
- Instant Pot – we use a 8L Instant Pot Duo Crisp, but any instant pot with a sous vide or yogurt function will do.
- Large slotted spoon (for removing the milk skim)
- Colander or large sieve, big enough to hold the volume of milk you are making into yogurt. We use a big stainless steel pasta colander
- Piece of cheese cloth (or muslin) large enough to comfortable fit into the colander or sieve. A big elastic band or kitchen clips are useful to hold the cloth in place while straining.
Step 1
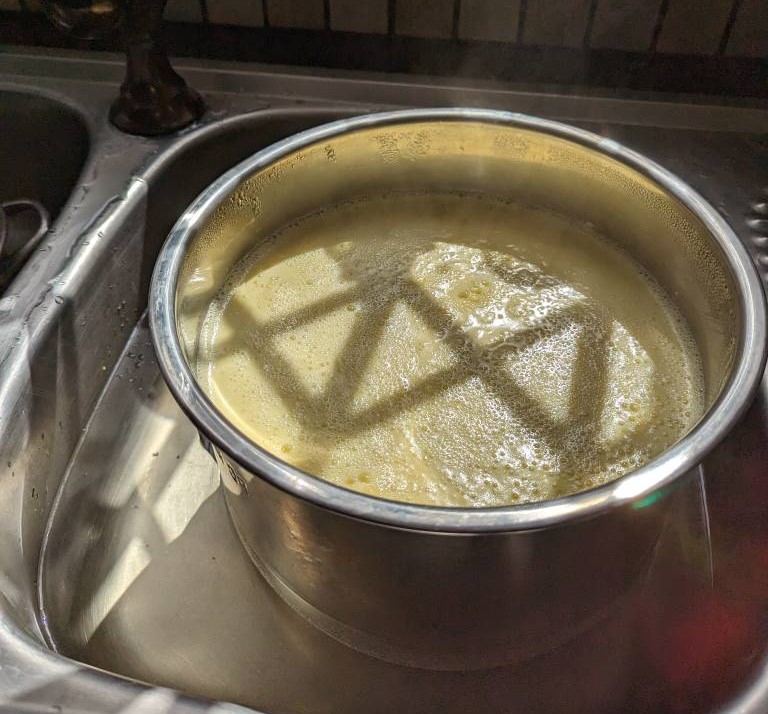
Pour milk into instant pot and using Sous Vida function set it to 93 degrees Celsius and timer to 30 minutes (the shortest time setting). Place the standard glass lid on the pot.
Stir a few times while the milk heats. Once it is at temperature and the timer starts then you can switch off the instant pot and let the milk cool. It doesn’t need to be at 93 degrees for more than a few minutes but if you’re doing something else – it’s no problem to let the milk stay hot for the full 30 minutes – we’ve just noticed its not quite as thick and creamy if it is left on for longer.
Step 2
Using a kitchen towel or gloves, carefully remove the inner stainless steel pot and place it in a sinkful of cold water with the lid off and let cool for about 20 minutes or until the pot is warm but not hot to touch. If you have a thermometer then 47 degrees celsius is the perfect temperature, somewhere around a hot but not scalding bath.
Using the large slotted spoon scoop off the milk skim
Step 3
Remove the pot from the sink and let dry for a few minutes – since the pot is still warm it should dry quite quickly, or use a cloth to dry fully (you don’t want to put a wet inner back into the instant pot)
Step 4
Place stainless steel inner back into the Instant Pot, and using the sous vide function again, set to 47 degrees celcius and time to 8 hours and press start.
Step 5
Add 1 tablespoon of natural live yogurt per litre of milk, or the equivalent starter culture – whisk the warm milk briskly while adding the yogurt. After adding the starter, give the milk another good whisk and put the lid on. Wait for 8 hours for the magic to take place.
NB: DON’T STIR AGAIN AS THIS WILL MAKE IT MORE VISCOSE
Step 6
After 8 hours, gently lift the inner pot out and place it in the fridge overnight or until chilled throughout.
Step 7
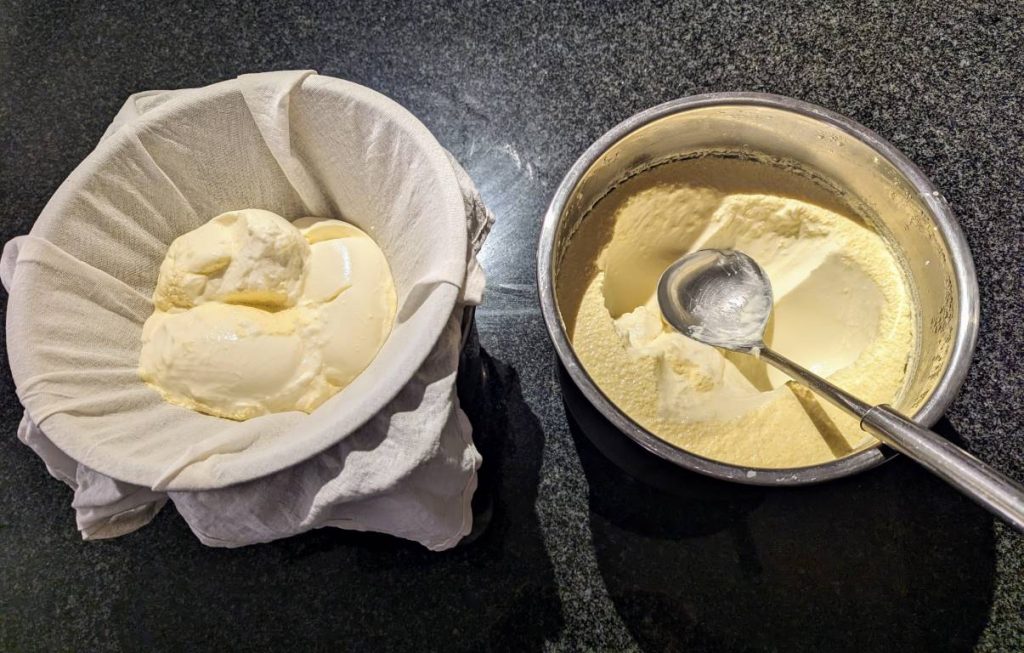
The yogurt is now set and ready to eat, and you don’t have to strain it if you don’t want – but we always do to get it really thick & creamy.
Place the colander or sieve in another pot (we use an identical 8L instant pot inner) and line with the cheese cloth or muslin. Hold in place with a elastic band or clips.
Step 8
Spoon the yogurt into the lined colander or sieve and place the whole pot and colander into the fridge – you might need to remove some shelves so it fits.
Step 9
Wait about 3 – 7 hours while the yogurt strains. The whey will separate and filter through the cloth and sieve into the pot below. Any more than 7 hours and you will get labneh – which is very thick, and more like cream cheese than yogurt.
We find the ideal ratio is about 60% the volume of the initial amount of milk. So 5L of milk makes about 3L of delicious creamy yogurt after straining. Different yogurt cultures make the whey strain off at different speeds so you’ll need to experiment with your cultures and taste preference.
Step 10
Spoon the strained yogurt into a clean pot or bowl and whisk thoroughly. It’s easiest to do this in small batches to get the yogurt nice and smooth.
Step 11
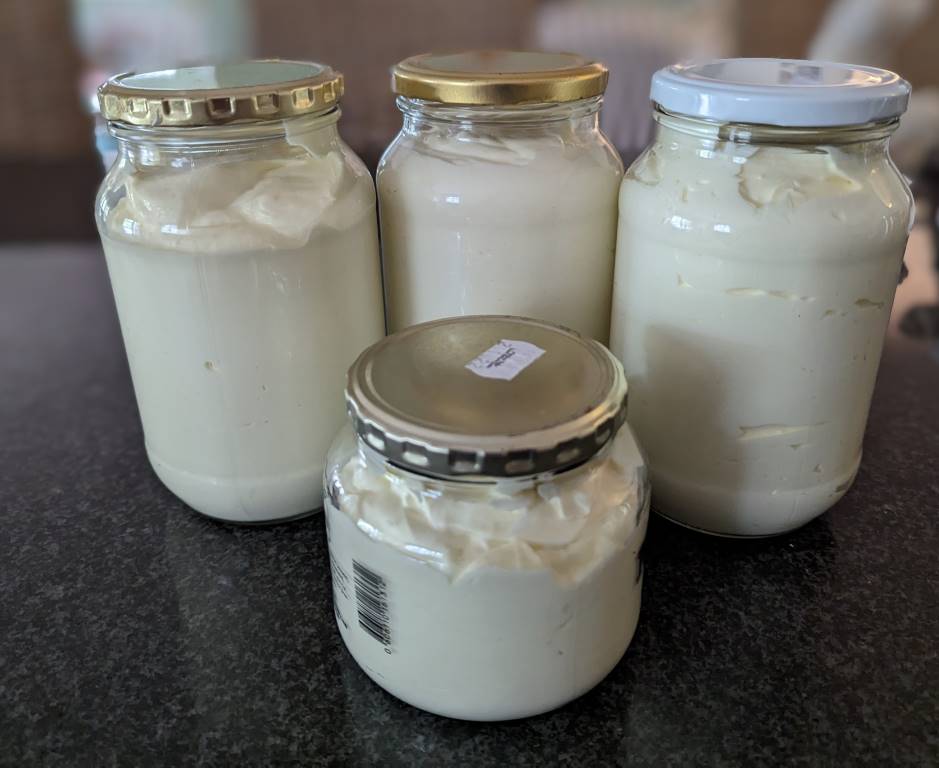
Once whisked and creamy smooth, spoon the strained yogurt into jars in big dollops and keep in the fridge.